
I shared a few weeks ago about my DIY wall calendar that I put together for under $30, and had no idea how many people would want to know how I did it! So today I’m sharing my step by step easy process of creating my custom wall calendar. And if you like what you see, I’ll be sharing the template as a free download at the bottom of this post!
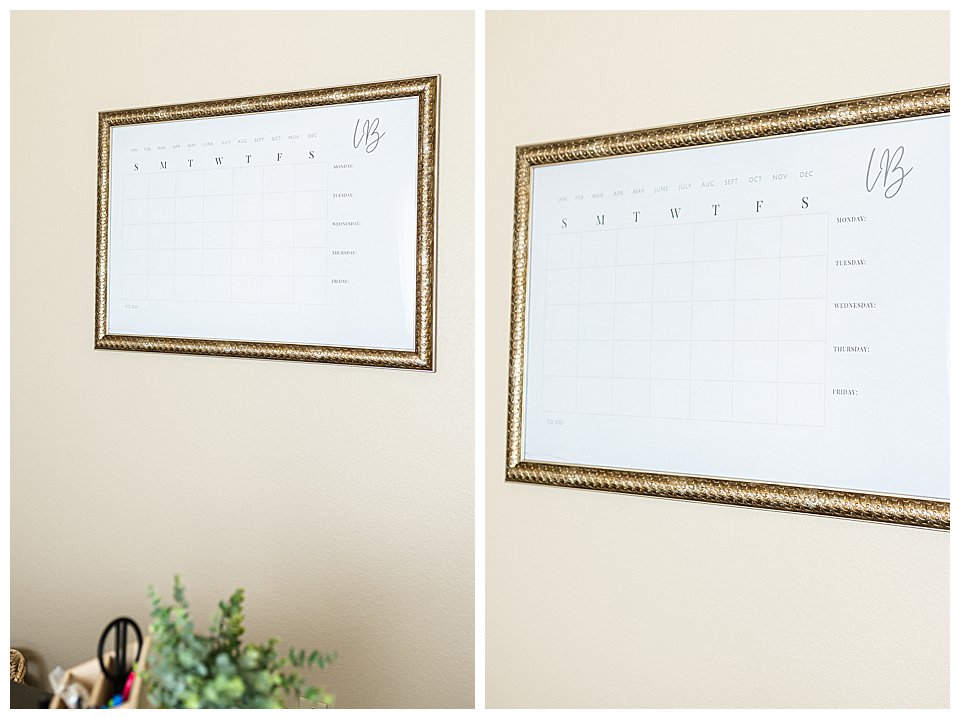
I’ve been eyeing some large dry erase yearly calendars online for a while now because I like the idea of being able to brain dump ideas, have a monthly overview for creative projects, and be able to physically see deadlines of things. I also like that when the month is over, I can erase everything and start over for the next month. What I really love the look of is the large acrylic dry erase calendars with the pretty gold hardware…
But I couldn’t pull the trigger on the almost $200 price tag… as beautiful as it may be.
So, one day I decided I would try my hand at making my own. If you know me, that’s probably not a surprise. I looked up the materials I would need (not many) and found that I could make one for SO much cheaper! I also loved that I could create the calendar to entail exactly what I wanted which would include a “to-do” area as well as a weekly breakdown – something I couldn’t necessarily find in the calendars I had been eyeing.
When I started pricing all the materials out, I realized just how inexpensive this little DIY would be. The engineer print would only be about $5. The poster frame would be about $24 (these range in prices, but I knew I wanted a gold frame so that is what I looked for). And if I wanted to replace the plexiglass the frame comes with to real glass, it would only be about $12 extra. So all in, I could make a large dry erase wall calendar custom to exactly what I wanted for around $40. WAY cheaper than the fancy ones I was eyeing!
I lucked out on the picture frame that I chose from At Home because it was 50% off due to having a crack in the glass in the bottom corner. After making sure that I could buy a precut 24×36 sheet of glass (for only $12), I went ahead and bought the frame for just over $12 making my all in material cost a whopping $18!! Though I haven’t switched out the glass just yet, I do plan to eventually do that. But for now, the crack in the bottom corner doesn’t bug me!
WHAT YOU’LL NEED TO MAKE YOUR CALENDAR:
- 24×36 Printable Calendar (download mine below!) printed as an Engineer Print/Blueprint
- Poster Frame or just a large 24×36 frame that you like
- 24×36 Glass Sheet (optional – the plexiglass that comes in a poster frame works just fine)
- Picture frame hanging materials (I just used 1″ nails we had on hand) and a hammer
- Dry erase markers & eraser
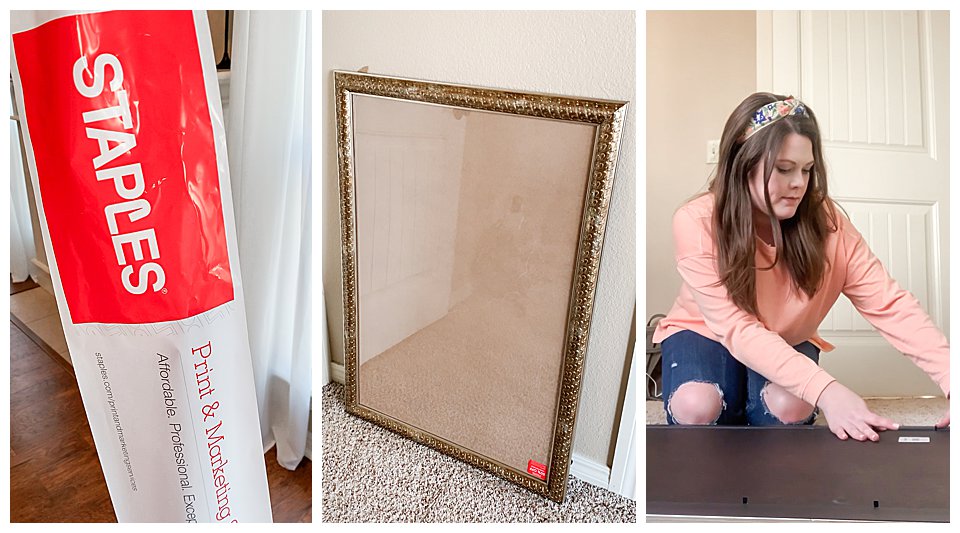
STEP ONE: Print off your calendar! You can download my free printable calendar template you see here (minus the “LB” I added to my own) down below, but if you have a digital file of a calendar that you love then use that! Go to Staples.com and order a Blueprint. Make sure you’re printing in black and white like I did to save a couple bucks! Just a heads up! You can have an engineer print or blueprint printed really large that is printed on printer paper for super cheap at Staples or any office store. Like $6! These blueprints are designed for architect drawings, building plans, etc. so the quality isn’t very high. It’s basically printed on a very large piece of printer paper you would have in your computer printer at home. The quality might even be a little grainy, but that didn’t bother me! If you want something a little nicer in quality, you can get the Heavyweight Standard Poster Print in 24×36 for about $30.
STEP TWO: Buy a frame! I searched online for a Poster Frame. Most Poster Frames are 24×36 and tend to be cheaper (due to the plexiglass glass instead of real glass) than typical 24×36 wall frames. Because I am the type of person that gets a project idea and wants to implement it that day, I looked online at stores in my area to see what I could get that same day and ended up liking this gold one from At Home.
STEP THREE: Assemble and hang your calendar! Just like any typical picture & picture frame combo. Since I printed my calendar as a blueprint, I did notice that the thin paper had a wrinkled look to it the first time I put it together. I knew that it would bug me in the long run, so I took some double sided tape and taped it to the picture frame backing as I smoothed out the paper. If you decide to buy a sheet of real glass instead of using the plexiglass that comes in the Poster Frame, this is when you would insert the new glass… just in case that’s not already obvious! Hang your calendar on the wall with a couple nails (or whatever you need to hang it) and you’re done!
That’s it! It’s super easy! Now you’re ready to start filling up your calendar and getting organized! I already use a digital calendar within my client management program, but this will be nice to have a visual on my monthly overview or projects as well as what each day of my work week will entails. I plan to use this wall calendar mostly for planning out blog posts, social media, and email marketing to hopefully give me motivation to keep up with those areas of my business. You could use it for business, family planning, meal planning – the options are truly endless!
Now get yourself some cute colored dry erase markers and an eraser and get to filling up your calendar! I love these multi colored fine tip expo markers I picked up from Target that will allow me to color code my projects and tasks! And of course I had to pick up an aesthetically pleasing sleek eraser while I was at it 🙂 You could even use cute washi tape to block off holidays, vacations, etc. if you really wanted to have some fun with it!
I’ve created a free printable of my exact monthly/weekly blank calendar (minus my personalized “LB”) that you can download use for personal use only to make your own DIY dry erase wall calendar!
I hope this was helpful to you! I can’t wait to see how you make this DIY your own!!
Enjoy!!
